In the fast-paced real estate market of 2026, where online listings dominate buyer decisions, professional-quality images remain one of the most powerful tools for attracting serious inquiries and closing deals faster. Properties with exceptional photography sell quicker and often at higher prices, as visuals create that crucial first impression. Shooting in raw format unlocks maximum potential during post-processing, capturing far more data than compressed JPEGs allow. This gives editors the freedom to recover details from shadows, tame harsh highlights from windows, correct color casts from mixed lighting, and deliver natural-looking results that accurately represent the property while making it irresistible.
This in-depth manual covers the whole lot had to edit uncooked pictures specially for real estate programs. Whether coping with interiors with challenging window light, exteriors beneath flat skies, or empty rooms desiring enhancement, the focal point stays on ethical, sensible upgrades that follow industry standards—no deceptive changes, simply polished shows. The workflow draws from modern high-quality practices using Adobe Lightroom Classic and Photoshop, with notes on rising AI-assisted tools that accelerate repetitive tasks with out sacrificing control.
Why Raw Editing Matters More Than Ever in Real Estate
Raw documents (CR3, NEF, ARW, and many others.) hold the overall dynamic variety and coloration statistics captured with the aid of the sensor, frequently 12–14 bits per channel compared to JPEG’s 8 bits. In real property eventualities, this distinction proves essential: vivid out of doors perspectives thru home windows regularly blow out in unmarried exposures, at the same time as interiors stay underexposed. Raw enhancing recovers the ones misplaced details, balances tones naturally, and avoids the artifacts that compression introduces.
Beyond technical advantages, uncooked workflows guide batch processing for high-volume shoots—commonplace whilst overlaying multiple houses day by day. Non-adverse edits mean experimenting freely without everlasting adjustments, and the ability to create presets hastens consistency across a listing’s 20–40 pics. In 2026, with shoppers scrolling listings on mobile devices, pics must load quick but provoke right away: sharp, nicely-uncovered, colour-correct shots convert viewers into tour requests.
Ethical enhancing remains paramount. Guidelines from fundamental MLS platforms and institutions restrict including or doing away with everlasting capabilities (like fireplaces or windows). Raw changes recognition on enhancement: straightening verticals, casting off temporary distractions (cables, reflections), and optimizing light to show off the gap truly yet appealingly.
Essential Setup: Gear, Software, and Preparation
Start with capture basics. Use a full-frame or APS-C mirrorless/DSLR with uncooked functionality, paired with a extensive-attitude lens (usually 14–24mm full-frame equal) to bring spaciousness with out excessive distortion. Bracket exposures—typically 3 to five stops (-2, zero, +2 or more)—on a tripod for HDR merging in excessive-assessment scenes.
Software alternatives in 2026 center on Adobe Lightroom Classic for company, uncooked development, and batch work, with Photoshop for specific retouching. Lightroom’s AI capabilities (like Denoise, Adaptive Presets, and Masking) handle plenty of the heavy lifting routinely while allowing guide overrides. Alternatives exist—Capture One for tethering/colour accuracy, Luminar Neo for AI-driven skies—however Adobe dominates expert actual property workflows because of integration and ecosystem support.
Hardware fundamentals include a color-calibrated screen (important for correct whites and neutrals), fast SSD garage for uncooked documents (20–60MB each), and at the least 32GB RAM for smooth HDR merges and AI processing. Organize shoots into catalogs or folders by deal with/date to streamline finding and syncing edits.
Step-via-Step Raw Editing Workflow in Lightroom Classic
Import raw files into Lightroom’s Library module. Flag keepers, cull rejects, then circulate to Develop for editing. Apply modifications non-destructively.
1. Lens Profile Corrections and Chromatic Aberration Removal
Wide-attitude lenses introduce barrel distortion and vignetting, especially noticeable on architectural lines. In the Lens Corrections panel, enable Profile Corrections and pick the lens make/model—Lightroom applies automatic fixes. Always test “Remove Chromatic Aberration” to do away with red/green fringing around high-evaluation edges like window frames.
Create a preset for this step. Apply it throughout import or sync throughout a shoot for performance.
2. Geometry and Perspective Correction
Real estate demands plumb verticals and level horizontals—leaning walls or tilted horizons undermine professionalism. Switch to the Transform panel and use “Auto” mode; Lightroom detects strains and straightens intelligently. Manual sliders (Vertical, Horizontal, Scale, Rotate) excellent-music if wished.
For complicated interiors, the Guided Upright tool we could manual line placement for precision.
three. Cropping and Straightening
Enter Crop mode (R key). Maintain widespread issue ratios (3:2 or 4:3) suitable for MLS/Zillow. Crop out distractions at edges (partial fixtures, baseboards) even as retaining context—shoppers want to look complete rooms.
Straighten horizons right here if Transform missed minor tilts.
4. White Balance and Color Foundation
Use the eyedropper on a impartial floor (white wall, gray ground) for accurate starting point. Real estate interiors advantage from slightly heat balances (4800–5500K) to experience inviting; avoid cool tones that make spaces appear sterile.
The Calibration panel adjusts primary colors—beneficial for correcting tungsten/LED mixes not unusual in present day homes.
5. Global Exposure and Tone Adjustments
In the Basic panel:
- Exposure: Overall brightness.
- Contrast: Adds depth without crushing blacks.
- Highlights: Recover window information (drag left).
- Shadows: Lift dark corners (drag right).
- Whites/Blacks: Set clipping factors for punch.
For bracketed shots, merge to HDR first: Select brackets, Photo Merge > HDR. Lightroom creates a DNG with prolonged range. Tone-map conservatively—herbal consequences outperform dramatic ones.
Use the Tone Curve for centered assessment: S-curve for pop, point curve for precise tonal manipulate.
6. Color Enhancement with HSL and Vibrancy
Vibrancy boosts muted colours subtly (great for foliage, fabrics); Saturation influences all colorings extra aggressively—use sparingly.
HSL panel targets specifics: Boost Greens for lawns, Blues for skies (if now not changing), desaturate Yellows if tungsten casts remain.
7. Detail: Sharpening and Noise Reduction
Raw documents regularly need sharpening. Detail panel: Amount forty–70, Radius 1.0–1.2, Detail 25, Masking 20–50 (protects clean areas).
Noise discount: Luminance 20–50 for interiors shot at higher ISOs; Color 20–30. Lightroom’s AI Denoise (Enhance > Denoise) can provide purifier effects with minimum detail loss—especially recommended in 2026.
8. Local Adjustments
Brush, Radial, and Linear Gradient equipment goal regions:
- Brighten underexposed corners.
- Dehaze home windows barely.
- Graduated filter on skies for diffused drama.
- Radial filter out to vignette edges gently, focusing attention inward.
AI-powered Subject/Sky/Background masks speed selections dramatically.
9. Advanced Retouching in Photoshop
For object elimination (cables, reflections, temporary gadgets), Edit In > Photoshop. Use Generative Fill (AI-powered in latest variations) for quick, seamless fixes—describe what to do away with/add, and it handles intelligently. Clone Stamp/Healing Brush for guide manage.
Return to Lightroom when done.
10. Final Export
Export JPEGs: sRGB, eighty–90 satisfactory, 3000–4500px long area, seventy two–300 DPI depending on platform. Watermark subtly if preferred. Batch export synced modifications.
Advanced Techniques for Professional Results
HDR Merging and Flambient Blending
Beyond simple HDR, “flambient” (flash + ambient) combines window-balanced brackets with flash-lit interiors for even, herbal illumination. Merge in Lightroom/Photoshop, then layer manually for realism.
Sky Replacement and Exterior Enhancements
Overcast exteriors? AI Select Sky + Generative Fill replaces with attractive blue gradients. Enhance grass/lawns via targeted HSL or brushes.
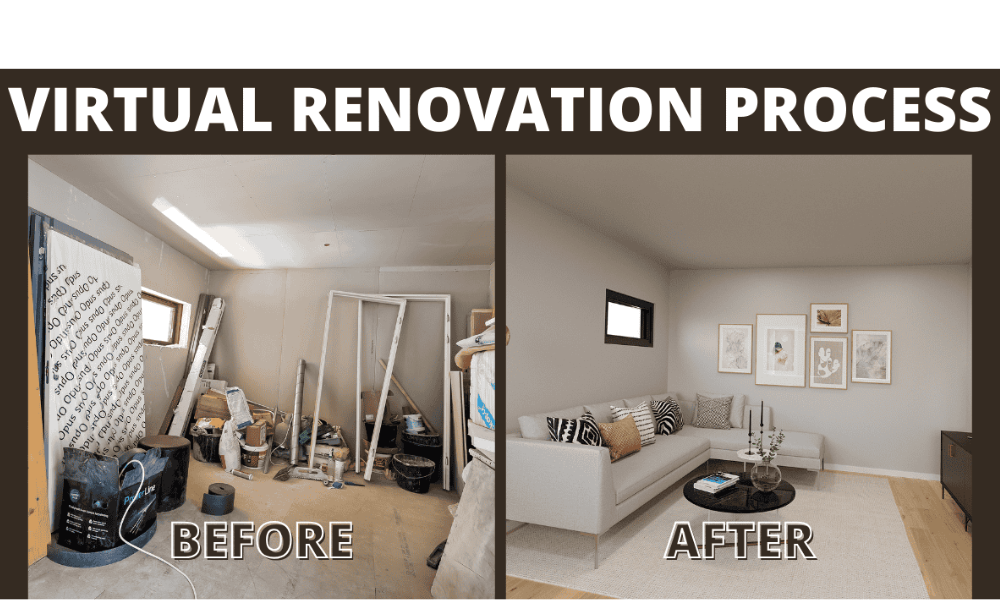
Virtual Staging and Renovation
Empty rooms promote slower. Use Photoshop layers or devoted services to add furniture realistically—fit lighting fixtures, shadows, perspective. Always disclose as “without a doubt staged.” Virtual protection shows up to date kitchens/toilets digitally.
Day-to-Dusk and Twilight Conversions
Warm interior lighting fixtures + cooler exterior nightfall tones create mood. Adjust white balance, add glows through brushes, tint windows.
AI-Accelerated Workflows
Tools like Imagen AI learn personal patterns from past edits, applying steady looks to new uncooked batches. Combine with Lightroom’s integrated AI for faster throughput with out losing nice.
Common Pitfalls and Best Practices
Avoid over-processing: Halos round windows, unnatural saturation, or plastic-looking sharpness scream beginner. Calibrate monitors often. Back up uncooked originals. Test exports on a couple of gadgets. Follow ethical regulations—transparency builds consider.
Batch processing and presets save hours on multi-photograph listings.
When to Outsource: Spotlight on PixelShouters
High-quantity photographers or busy dealers regularly outsource to hold first-rate and speed. PixelShouters sticks out as a leading actual property picture enhancing company with over 8 years of specialized enjoy. Operating from New Delhi, they serve international clients with services which includes HDR blending, item removal, sky alternative, virtual staging, virtual preservation, aerial improvements, and 360° excursion aid.
Known for 24-hour turnarounds, aggressive pricing, loose trial alternatives, and incredible interest to detail, PixelShouters has earned reward from hundreds of photographers and realtors. Testimonials spotlight their efficiency, steady satisfactory, and expertise of real property marketing needs—making them a reliable associate for dealing with uncooked files into polished deliverables.
Outsourcing frees time for shooting at the same time as making sure professional consistency, mainly at some stage in height seasons.
Final Thoughts
Mastering raw photograph modifying for real property in 2026 combines technical precision with an eye for what sells houses: bright, inviting, accurate representations that spark buyer imagination. Start easy—recognition on exposure stability, instantly strains, herbal colorings—then layer superior techniques as talents develop. Leverage AI where it complements velocity without compromising manipulate, and recall depended on companions like PixelShouters for scaling.
Consistent practice on real shoots builds instinct. The goal isn’t perfection however pics that make residences sense like home. With this workflow, listings stand out in crowded markets, riding quicker sales and more potent client delight.
read more blogs on – how to cure and treat